
In 1977, Star Wars was released, and filmmaking has never been the same since.
It was a monumental achievement, and A New Hope remains an iconic film even today. It’s awesome in so many ways, and the Trench Run at the end remains one of the coolest Star Wars moments. There are so many things that could be said about what makes this scene so great – the effects are great, the music is stellar, etc. – but I want to point out another thing that I’ve really come to appreciate about it: it’s a masterpiece in film editing.
That’s no surprise, since the film won the Academy Award for Best Film Editing (for Paul Hirsch, Marcia Lucas, Richard Chew), but what I mean by this is that the film tells you exactly what should happen, then shows you exactly what should happen, and this makes what actually winds up happening all the more compelling.
1. We’re told what should happen
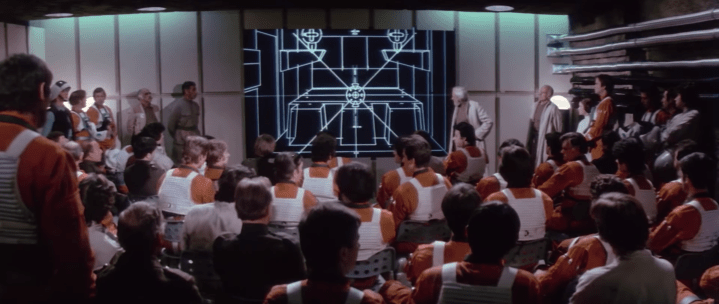
In the Rebel briefing on Yavin 4, General Dodonna provides the plan of attack: the Death Star is heavily shielded, but its defenses are geared toward repelling a large-scale assault. The Empire doesn’t consider a small one-man fighter to be a threat.
So the Rebels recognize that a one-man fighter can penetrate the defenses. Once that happens, there’s a weakness, but it won’t be easy to exploit. The pilots must maneuver down a narrow trench to a certain point, where there’s a small thermal exhaust port two meters wide. This exhaust port leads directly to the reactor system, so a direct hit would trigger a chain reaction and destroy the whole station. But the exhaust port itself is ray shielded, so ion torpedos are needed.
Col Takbright, aka “Fake Wedge”, expresses serious doubt about this plan, saying it’s impossible even for a computer. Luke Skywalker disagrees, but nonetheless the stage is set: we know that this plan is nearly impossible, even for a computer, and that everything has to go exactly right in order for this small chance to work.
2. We’re shown what could happen

When the Rebel forces arrive at the Death Star, the first part of the plan comes to pass. The Death Star defenses aren’t capable of handling the small fighters, just like Dodonna predicted, which causes the Empire to send out TIE Fighters to fight the Rebels ship-to-ship.
In the midst of this, Gold Leader Jon Vander takes some fighters and makes the Trench Run. But Darth Vader and two TIE pilots enter the trench in pursuit, and the Rebel pilots are killed without even getting a shot off at the exhaust port.
So in this initial attack run, we are shown what could happen. We already knew that this was a very dangerous mission and nearly impossible, but now we get a chance to actually see the dangers that come with it. Gold Leader makes the Trench Run, but he’s killed before even getting to the exhaust port. Not only is it going to be hard to hit the two meter wide port, but it’s also going to be hard to even get there. The Death Star turbolasers might not be capable of combatting these fighters, but Darth Vader and his TIE pilots certainly are. And that’s not what the Rebel Alliance planned for. This nearly impossible mission just got harder, and we get a chance to see the failure and understand both the danger and the long odds.
3. We’re shown what should happen
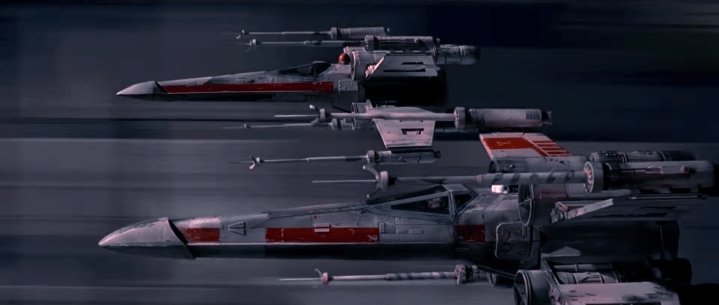
Not long after Gold Leader’s failed attack run, Red Leader Garven Dreis makes his attack run, taking a couple of fighters with him. And just like with Gold Leader, Darth Vader soon is in pursuit. He manages to take out the other fighters, but Red Leader makes it through the Trench Run unscathed. His targeting computer locates the exhaust port, and he fires his ion torpedoes at it… but it only impacts on the surface. Shortly after pulling out of the trench, Red Leader is killed.
So this time, we’re actually shown what should happen. Previously, we were told what should happen, and then shown what could happen, but now we’re actually shown what should happen. This is the attack run that goes according to plan, with Red Leader entering the trench, making the Trench Run to the end, having his computer locate the exhaust port, and firing the ion torpedoes at the port. Except… it doesn’t work. It misses. The shots just impact on the surface, causing minimal damage.
This leaves the audience realizing the dire state that the Rebellion is in: once again, we understand just how close to impossible this mission is. Red Leader did everything according to Dodonna’s plan, yet still wasn’t able to destroy the Death Star. What hope is left?
4. We’re shown what shouldn’t happen

So Red Five Luke Skywalker takes with him two fighters, Red Two Wedge Antilles and Red Three Biggs Darklighter, and they make the Trench Run. This time, though, pretty much nothing goes according to plan:
- Luke goes in “full throttle” to keep the fighters off their backs, making it harder to pull out in time (and to maneuver the trench).
- Wedge’s scope can see the tower but can’t see the exhaust port, causing him to doubt whether the computer can actually hit it.
- Luke’s stabilizer breaks loose again, and he asks R2-D2 to try to fix it.
- Wedge’s ship is damaged and he’s forced to get clear.
- Biggs is killed.
- Luke switches off the targeting computer, prompting Rebel Command to ask him what’s wrong.
- R2 is hit, leaving Luke flying without both his computer and his droid.
- The Death Star is cleared to fire, meaning it’s now-or-never for the Rebellion.
- Darth Vader has Luke in his sights.
All of those things are made abundantly clear from these moments in the film, but here’s the important part: the only reason we know that everything is going wrong is because of what has come before it. Because we heard General Dodonna’s briefing, we knew what should happen. Because we had seen the previous two Trench Runs, we knew that this is a very dangerous mission and that even with everything going right it’s no sure thing. And now? Everything is going wrong. How could there possibly be any hope now?
Of course, you know the rest. Han Solo and Chewbacca arrive in the Millennium Falcon just in the nick of time, dealing with Vader and the TIEs to give Luke a clear shot – which he takes, using the Force, and hits. The Death Star is destroyed, the Empire is dealt a huge blow, and the inspired Rebellion lives to fight another day.
All of this, combined with the effects, music, drama, etc., adds up to an incredible and iconic scene. But like I said earlier, one of the things that I’ve really come to appreciate about this scene is the way it is edited. This is intended to create more tension and drama, particularly during Luke’s Trench Run, because we know for certain that none of that is according to plan – making it even more incredible when Luke pulls it off. And that’s just great storytelling.
